I am in a moment that I want to change my health. I know that by simply changing my health, a lot of my life that I want will come naturally. It's not weight loss that I want, but it's the life I've lost because of my weight. I need to move forward and walk the walk. I have a ton of knowledge about health, yet I have bad follow through. This blog will make a difference because hopefully I can make a difference in your life. .

Friday, April 30, 2010

How to Make Coconut Milk


If you….
  1. Love recipes that only take about 3 minutes of total prep time…
  2. Love all things coconut
  3. Don’t love all things coconut (like me…but I love this milk!)
  4. Love milk
  5. But maybe don’t like or can’t drink regular milk for various reasons
  6. Are a Vegan
  7. Don’t like paying for overpriced coconut milk in the stores
  8. Like being able to control the type/amount of sweetener in your coconut milk
  9. Have yet to ever experience the sweet, creamy, rich goodness of coconut milk…….
Then this recipe is for you!!!!!

Truly, it’s so fast, and so simple, so cheap, and so delicious that there’s no reason NOT to try it.  :)  It’s full of great nutrients, and can be used a zillion ways.  (I’ve included a short list below of some possible uses, both in and out of the kitchen.)  So grab a bag of coconut, and give it a try!  I really think you’ll love it!


How To: Make Coconut Milk
(Adapted from Elana’s Pantry)
Ingredients:
  • 2 cups unsweetened shredded coconut
  • 4 cups water
  • 1 Tbsp. honey or agave nectar (or 6 drops stevia)
  • 1 tsp. vanilla extract
Method:
Soak coconut in water for 1-2 hours (do not discard water).
In a blender (or you could do small batches in a food processor), combine coconut, water, vanilla and honey and process on highest speed.
Strain liquid through a fine mesh strainer (or a strainer bag, or cheesecloth would work), discarding solids.  Serve or refrigerate.
Possible Uses:
  • Baking: can be used as a substitute for milk in a variety of baking recipes
  • Beverages: coffee, tea, smoothies, milkshakes, eggnog, pina coladas, or a variety of alcoholic beverages
  • Cooking: used in noodle dishes, rice dishes, grain dishes, stir-frys, etc., and it is called for especially in many Thai, Indian, African and Hawaiian dishes
  • Skin Care: used as a moisturizing face wash, mixed into water for a bubble bath, or even used as a hair conditioner
Ali’s Tip:
This also works with sweetened coconut.  Just omit the extra natural sweetener (honey, agave, stevia, etc.).


April 19th, 2010

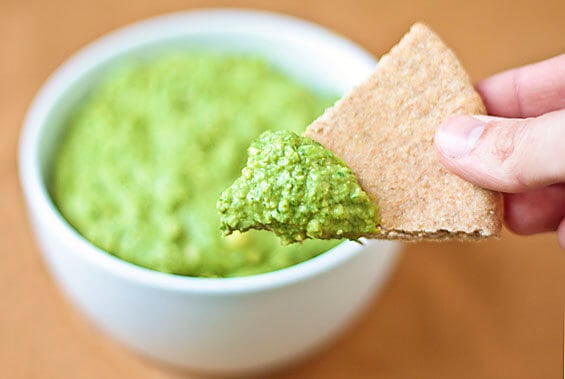
For the final recipe on Day 7 of “Hip Hip for Hummus Week”, we visit a classic cheesy dip translated into a healthier (and vegan) alternative — spinach and artichoke hummus!
I thought it would be a fun experiment, but was surprised by how much I loved this recipe!  The classic spin-artichoke combination, paired with the rich tahini and lemon juice proved to be even more flavorful (in my opinion!) than the classic dip I’ve made for years!  And…you get to trade in a bunch of extra fiber for all of that cheese.  :)
I’m sure I’ll still continue to make both, but this is a wonderful alternative for whenever you get the spinach artichoke craving!  And, with no baking required, it can be whipped up in less than 5 minutes.  Perfect!
As a recap, here were the 7 recipes in “Hip Hip for Hummus Week”.  Enjoy!!


Spinach Artichoke Hummus
(Original recipe)
Ingredients:
  • 1 (15 oz.) can chickpeas, drained (juice reserved)
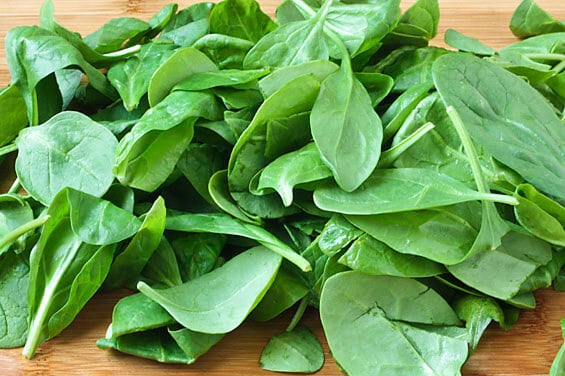
  • 4 cups fresh spinach, loosely packed
  • 1/2 cup artichoke hearts
  • 2 Tbsp. tahini
  • 2 Tbsp. lemon juice
  • 2 Tbsp. olive oil
  • 2 cloves garlic, peeled and smashed
  • salt and pepper, to taste
Method:
Combine all ingredients in a food processor, and blend until smooth.  If you desire a thinner consistency, add in a few extra tablespoons of the reserved chickpea juice.
Ali’s Tip:
To give this an extra kick, I also tried adding in a seeded fresh jalapeno, and it was fantastic!  You could even add in half of a pepper if you’d like.
Also, to make this taste a little more like classic spinach-artichoke dip, just mix in 1/4 (or 1/2 cup) grated parmesan cheese.

Aren’t these just wonderful?
Let me introduce these delicious ingredients that have been captured bathing in the morning sun.
And they are ready and eager to turn into…


… the most yummilicious and soul-warming soup ever invented.


And here we have our ingredients introducing themselves to you in a written form.
So kind of them.
In case you’d also like to have the delightful experience of tasting this soup, just go on and follow these easy steps


1. Chop the onion finely.
Chop, chop, chop.


2. Cut the carrots into small even dices.


3. Remove the leaves from the cauliflower and cut it into halves.


4. Now break it into individual florets.
Rinse the florets under running water and then slice them into smaller pieces – you can slice one floret into 2 or 3 pieces (depending on what mood you are in).


5. In a large soup pot melt two tablespoons butter.


6. Add the chopped onions, stir and let them get a little color inside there.


7. Then, after about 3 minutes, add the carrots.
Stir around for about 2 more minutes.


8. Soon we are going to use the chicken broth/bouillon.
You can use the ready-made stuff from a store or you can prepare it at home – from bouillon cubes – like I do.
I used 3 bouillon cubes for 7 cups (1.75 l) hot water.
And, of course, you can also use your own, home-made bouillon.
You really have a wide range of possibilities here.


9. Throw the cauliflower into the pot and pour in the bouillon.


10. Add 2 teaspoons parsley, …


11. … 2 bay leaves, …


13.  … and 1/4 teaspoon black pepper.
Stir to combine.
14. Cover and bring to a boil over medium heat.
Then reduce the heat and let the soup simmer for about 25-30 minutes.


15. Meanwhile, we can prepare our white sauce that will make the soup nice and thick.
In a separate bowl, combine 3 cups milk with 4 tablespoon flour…


… and mix with a whisk.


16. In a medium saucepan, melt 1 tablespoon butter.


17. Pour in the ‘milk-flour’ mixture…


18. … and stir constantly over medium heat.
Bring to a boil and mix for about 2 more minutes.
Then remove from the heat.


19. Add the white sauce to the soup mixture and stir to combine.
Let simmer for about 5-10 more minutes.
Then remove from the heat.
Add 2 1/2 heaping tablespoons sour cream and stir again.
Taste the soup and add salt to taste (if needed).


This is D-E-L-I-C-I-O-U-S!
Just trust me.
The best soup ever.


This summer, take the time to get a little dirty and source your food outside the market. Get to know the people who make your food.  See where your food comes from. And eat it right from the ground, dirt and all.
Photo by Cheryl

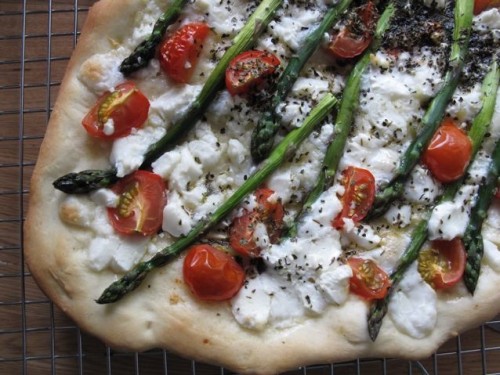
Asparagus and Tomato Pizza

Use your favorite pizza dough (or my version) to create a summery pizza.  Vary the toppings according to what’s in season and what you find that day on your farm visit.
  • 1 clove garlic, finely chopped
  • 1-2 tablespoons olive oil
  • 1/2 bunch asparagus
  • 1/2 pint cherry tomatoes, halved
  • 1/2 cup crumbled feta cheese
  • 1 tsp dried oregano
  • Pizza Dough
1. Preheat your oven to 450 degrees F. Pull out your dough into rough 8-10 inch circles. Place onto a thick cookie sheet or pizza stone sprinkled with cornmeal.
2. Trim any rough bits from your asparagus (if it is farm fresh you shouldn’t have to do a thing). Cook in boiling water for 1 minute then immediately submerge in ice water to stop the cooking.
3. Drizzle your stretched pizza dough with the garlic and olive oil.  Arrange the asparagus and halved tomatoes over the pizza. Sprinkle the feta and oregano on top. Add an extra drizzle of olive oil on top.
4. Bake for 10-15 minutes until pizza is cooked all the way through and cheese is bubbling slightly.

Whole Wheat Spaghetti with Green Garlic and Fried Egg

Whole Wheat Pasta with Green Garlic and a Fried Egg

Another week, another whole wheat pasta recipe with a spring delicacy. I first fell in love with green garlic two years ago when I started food blogging. It has such a great flavor and cooking with it is easy and it doesn't burn as quickly as garlic cloves. I pretty much only use the white and light green parts, but in the LA Times version of this recipe, it looks like they use the whole thing. It's a great, quick cooking dish and the egg yolk helps create a lovely creamy sauce. It's been a little chilly here this week so this was a nice dish to curl up on the couch and watch some of my favorite trashy tv shows.


Whole Wheat Spaghetti with Green Garlic and Fried Egg
(Slightly Adapted from the Los Angeles Times)


Makes 2 servings

4 ounces whole wheat spaghetti
4-5 stalks green garlic, halved lengthwise, washed, dried and sliced thinly
3 tablespoons olive oil, divided
2 eggs, at room temperature
Coarsely grated black pepper
Sea salt

Bring a large pot of salted water to a boil and cook the spaghetti until just al dente, about 9-11 minutes, or according to the instructions on the package.

Meanwhile, heat 2 tablespoons of olive oil in a large skillet over medium-high heat. Add the garlic and cook until tender and beginning to caramelize, about 5 minutes, stirring frequently so as not to burn. Remove the garlic from the pan and put it into a large bowl. When the pasta is cooked, add it, with a bit of the pasta water, to the bowl with the garlic and toss to combine.

Add the remaining 1 tablespoons of olive oil to the pan and turn the heat to high. One at a time, break the eggs into a small bowl and gently pour into the hot skillet, trying to keep them from touching. Cook until the edges are crispy and golden brown, the whites are set and the yolks are still runny.

Divide the warm pasta among plates. Gently slide an egg onto the top of each. Grind plenty of black pepper over each plate and add a generous pinch of sea salt. Serve immediately.

Strawberry Jam - Granulated Sugar Free, Pectin Free & Dead Easy


Many summers ago I woke up with an almost overwhelming urge to connect with the brave frontier women who came before me by taking perfectly sun ripened fruit and turning it into jam thus preserving the bounty of the harvest for the long hard winter to come.


I set off early, purchasing enormous pots, sterilizing equipment, cute jars and flats of peaches. Happy with my haul (and poorer by about $250.00) I got to work. I blanched, peeled and pitted. I washed and sterilized. I boiled, simmered and stirred, all the while humming a wordless tune I was certain my fore-mothers had hummed many moons ago.

And then it happened! What can only be described as an apocalyptic catastrophe turned my peaceful afternoon into a scene so horrendous it would surely be rated NC-17 (for violence) if life were rated the way movies are. Jars started exploding, shooting out shards of glass covered with sticky, icky goo everywhere. The shards embedded themselves into the cabinets, walls and ceiling dropping fat splatters of peachy tar over every surface.

I plucked goopy glass from my hair, arms and feet. I washed and scrubbed and mopped. I cursed my fore-mothers so loudly and vehemently it would have brought a blush to Joe Pesci’s face.

At the end of a very long, arduous day I surveyed the fruits of my labor. I had one $250.00 jar of slightly brownish, uncongealed peach jam, a spotless kitchen and a body covered with Hello Kitty Band-Aids.

It was then that I realized that those brave frontier women who came before me didn’t have a choice. They had to preserve the fruits of the harvest lest they stave during the cold hard winters. I also realized I lived in California where the winters are anything but cold and hard, that I have a damn car and can go to the damn store and buy some damn jam.

That was the end of my jam making until recently. I got swept away by the gorgeous strawberries at the market selling for a pittance and brought home far more than I could consume before they went bad. What to do?


I decided I would make jam again. But this time on my terms. Forget those damn frontier women. So I came up with what is possibly the easiest jam known to man (and certainly to those fore-mothers of mine). It also happens to be granulated sugar and pectin free jam. And yes, of course, it is gluten free as well.

So if you like slaving like a dog for your jam, then skip this recipe. If on the other hand you want to revel in luscious jam that is ridiculously easy, then by all means read on.


Strawberry Agave Jam

(printable)

Ingredients:

1 pound fresh strawberries, hulled, rinsed and halved
½ cup agave nectar

Directions:

Combine strawberries and agave in a heavy saucepan over medium high heat and bring to a boil. Lower the heat so that the mixture continues to boil gently. Stir the mixture a few times while cooking to prevent sticking or scorching and mash the berries a few times, a potato masher works well for this or you can use the back of a spoon.

Continue cooking for 25 minutes or until the berries have broken down and the mixture is very thick. Cool to room temperature. Mixture will thicken and jell up as it cools.

Store in a clean jar for up to a week.

Makes about 1 cup of jam.

Potluck Pockets

Here is another recipe for you today that uses pitas.  I am hoping to try a homemade version of pitas soon.  When I do I will share.
This is a recipe I have been making for a while and is a family favorite.  I found it years ago in a Taste of Home magazine.  The pockets are filled with a savory beef filling.  Then you drizzle it with a sauce.  The recipe is quite salty so if you are not a fan of salty you may not like this one.  The salty flavor comes from soy sauce and worcestershire sauce.  This will be a great recipe for warm weather,  It’s all made on the stove top!  It also comes together in about 30 minutes.

Potluck Pockets
  • 1 pound ground beef
  • 1/2 cup chopped onion
  • 1/2 cup chopped green pepper
  • 2 tablespoons Worcestershire sauce
  • 2 tablespoons soy sauce
  • 2 teaspoons garlic powder
  • 1 teaspoon ground cumin
  • 1/2 teaspoon Italian seasoning
  • 6 pita breads, halvedon
  • 2 medium tomatoes, diced
  • 3 cups shredded lettuce
  • SAUCE:
  • 1/2 cup soy sauce
  • 1/4 cup white vinegar
  • 2 tablespoons Worcestershire sauce
  • 1/2 teaspoon onion powder
  • 1/2 teaspoon Italian seasoning
  • Dash pepper
  1. In a large skillet, cook the beef, onion and green pepper over medium heat until no longer pink; drain. Add the Worcestershire sauce, soy sauce, garlic powder, cumin and Italian seasoning; mix well. Bring to a boil. Reduce heat; simmer for 5-10 minutes.
  2. In a small saucepan, bring sauce ingredients to a boil. Reduce heat; simmer for 5-10 minutes. Spoon meat mixture into pita halves; top with sauce, tomatoes and lettuce. Yield: 6 servings

Fruited Tuna Salad Pitas

My last and final prize winner for the blue topaz is Valen who said, “Love that necklace and cake!”  Enjoy the necklace,  it is a simple yet beautiful design.
As the weather starts to warm up, it would be nice to have a few great meals that don’t require much effort or time in the kitchen.  This recipe for Fruited Tuna Salad Pitas came from my recent issue of Simple and Delicious.  It is perfect for those kind of days.  I have had a sweet tuna salad before with fruit in it and loved it, so I figured I would also enjoy this version.  It was tasty.
My family turned their nose up at it at first but loved it once they had their first bite.  My husband is not a fan of mandarin oranges and he didn’t mind them at all in this dish.  Light and refreshing, perfect for those I don’t want to cook nights!  The salad is intended to be put on a whole pita and eaten like a taco.  However, it would also work well inside a pita pocket if you’d prefer.  You could  place them on the flat bread recipe I have shared before.  You could even substitute chicken for the tuna too.

Fruited Tuna Salad Pitas
  • 1/2 cup mayonnaise
  • 1 Tbsp. honey
  • 1 can (12 oz) white albacore water packed tuna, drained (regular tuna would also work)
  • 1 can (11 oz.) mandarin Oranges, drained
  • 1 medium apple, chopped
  • 1/3 cup chopped pecans
  • 1 rib celery, thinly sliced
  • 1/4 cup dried cranberries
  • 1/8 tsp. salt
  • 4 (6 in.) pita breads
  • alfalfa sprouts (or you could use lettuce if you prefer)
  1. In a large bowl, combine the mayonnaise and honey.
  2. Stir in tuna, apple, pecans, celery, cranberries and salt.  Gently fold in the oranges.
  3. Top each pita with sprouts followed by the tuna salad.

Black Bean and Pepper Salad Recipe with Cilantro and Lime


Black Bean and Pepper Salad with Cilantro and Lime(Updated and added to Recipe Favorites, April 2010.) Black beans are such a great pantry ingredient, and this simple salad with black beans, red and yellow bell pepper, red onion, lime, and cilantro has all the flavors that make me happy. I love the colors in this salad too, so when I made it recently to take to my dad for lunch I decided it was time to take new photos and update the recipe. For best flavor, mix the dressing and let the beans marinate for a while (or at least while you chop the other ingredients) but even if you're in a rush like I was and forget to marinate the beans, it will still taste pretty great!

Drain the black beans into a colander placed in the sink, then rinse with cold water until no more foam appears and let beans drain.

If you have a fresh lime, some lime zest added to the dressing really brightens the flavor.

After you mix all the dressing ingredients, marinate the drained beans in part of the dressing mixture if you have time.

Chop peppers the same size as the beans, and mix the marinated beans and peppers together.

I used Rick Bayless' cilantro chopping method where you keep the bunch of cilantro together and thinly slice the leaves up to where the stems start.

Mix the red onion and chopped cilantro into the bean and pepper mixture, then add the rest of the dressing, season with salt and fresh ground black pepper and serve.

Black Bean and Pepper Salad with Cilantro and Lime
(4 servings, recipe created by Kalyn with inspiration from a blog that no longer exists)

1 can black beans, rinsed well and drained
1 red pepper, chopped
1 yellow pepper, chopped
(could use any combination of colors for the pepper, or use 2 red peppers)
1/2 red onion, chopped
1 bunch cilantro, chopped

Dressing:
2 T lime juice (fresh lime juice recommended)
2 T extra virgin olive oil
1/4 tsp. ground Chipotle pepper (I use Penzeys)
(you could use green Tabasco in place of the Chipotle pepper)
1/2 tsp. mild chile powder (New Mexico chile powder is best)
1/2 tsp. ground cumin
1/2 tsp. onion powder
zest of one lime (optional, but recommended)
Vege-sal or salt to taste
fresh ground pepper to taste

Put black beans in a colander placed in the sink and rinse with cold water until no more foam appears. Let beans drain, preferably 30 minutes or so, until beans are no longer wet. (If you're rushed for time, you could blot them dry with paper towels.)

Mix dressing ingredients. Put beans and dressing into a plastic bowl with a snap-on lid, put lid on, and turn bowl over a few times until the beans are well coated with the dressing. Let the beans marinate in the dressing for an hour or so if you have time, or at least while you chop the other ingredients.

Chop peppers and onion into pieces about 1/2 inch square. (I was aiming for the beans, peppers, and onions to be approximately the same size.) Wash cilantro and dry well (I used a salad spinner) then chop coarsely.

In large bowl, gently combine beans, peppers, and onion. (If mixture seems dry you can add a tiny bit more olive oil and lime juice at this point.) Season to taste with Vege-sal or salt and fresh ground pepper. Stir in cilantro and serve.

This will keep for a day or two in the refrigerator, although it's best when the cilantro is still crisp. However, I taste-tested it on my friend Robin when it had been in the refrigerator overnight and she gave it a very enthusiastic thumbs up.


South Beach Suggestions:
Everything in this salad is a perfect low-glycemic ingredient, making this a great recipe for any phase of the South Beach Diet. (Remember that dried beans are limited to 1/3 to 1/2 cup serving for phase one.)

Couscous with Tomatoes, Basil, Scallions: Caring for those who care for your kids.

For CY, my favorite elementary school teacher and all the teachers out there who do it for our children. Thank you.

It's been busy at our house as Daughter #1 has started kindergarten. She has been at school since she was 20 months old so the adjustment of sending her to school wasn't difficult, but as the school year started, I wanted to be more involved at her school. I know, as a former high school teacher, that without strong parent involvement, public education has the high likelihood of failing the next generation of children. The reasons why are numerous and many and not the purpose of this post, but I will make my plea that if you can, you should definitely get involved in your child's school, however small the effort.

I've been in Daughter's kindergarten class once a week helping out since her school started back in July. (She attends a year round school.) The kindergarten day is short, but the things that Daughter's teacher deals with blow my mind. 22 kids in the classroom, all at different levels of achievement, different backgrounds, different cultures and native languages. In addition, there are numerous assessments, tests, and evaluations that need to be completed for every single child in the class. Even after only 1.5 hours of volunteering in the classroom, I'm pretty spent mentally and need a break. Daughter's teacher continues on for another couple of ours before her day is over.

I've always liked to cook and bake things for Daughters' teachers and this year is no exception. Something nice to eat at the end of the teaching day is an gift with an intangible value. It shows love, appreciation and the acknowledgment of your child's teacher's efforts on behalf of your son and daughter. I've baked for Daughter's teacher on quite a few occasions but today I wanted to bring her LUNCH, so I quickly made this couscous salad to bring to her. I topped the one I gave to the teacher with feta, so as to make it more substantial, but this is really excellent without the feta as a side to any grilled or simple protein as the balsamic adds a special flavor. It is simple, comes together very easily but is a wonderful way to show your child's teacher that you care and you want to thank him or her.

Here are a few more ideas of great and easy lunches to bring to the teachers:

Orzo Salad with Tomato, Feta, and Green Onions
Tri Colore Orzo
Curried Chicken Salad (in a sandwich or presented with some crackers)


Couscous with Tomatoes, Basil, and Scallions
Serves 4-6

2 cups boiling water
2 cups dry couscous (I use whole wheat couscous)
1 teaspoon salt
1 tablespoon olive oil

2 cups cherry tomatoes, sliced in half (depending on the size)
1 cup chopped scallions
1/2 cup basil, chiffonade

1/4 cup balsamic vinegar
1/4 cup olive oil

In a large bowl, pour in dry couscous, salt and olive oil. Carefully measure out two cups of boiling water and pour over couscous. Give a quick stir and find a lid to fully cover the bowl. Let sit and steam for 7 minutes.

Meanwhile chop scallions, basil and tomatoes and set aside. Whisk together balsamic vinegar and olive oil. Take off the lid of the couscous, and using a fork, fluff up the couscous. Add tomatoes, scallions and basil and drizzle balsamic vinegar and olive oil dressing. Toss well.

Serve as a side to protein, or to make it a more substantial meal on it's own, top with feta cheese.

Printable recipe

A bowl of something delicious - who wouldn't want that!

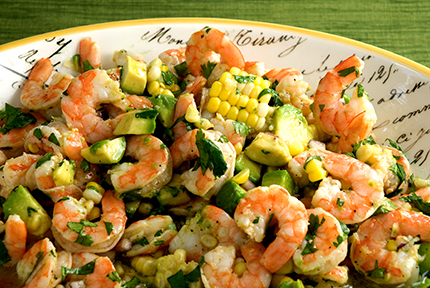
Shrimp Salad with Lime Vinaigrette


This is what you call a “floating recipe”.  Meaning that it comes from a friend, who got it from her neighbor who got it from…who knows anymore?
Anyway, I was at my friend’s house for lunch last week, and she served this delicious, bright, easy-to-make salad.  This is just one of those great combinations of ingredients that afterwards, you can’t wait to eat again.  I asked her for the recipe while my mouth was still full (and she’s the amazing kind of friend that sends it right away).   I made it the next day for my family—and ended up sharing it with our neighbors—who asked for the recipe while their mouths were still full…and now I’m casting it even further into the universe because this really should belong to everyone—it’s just that good.
Shrimp Salad with Lime Vinaigrette
Serves 4
Ingredients:
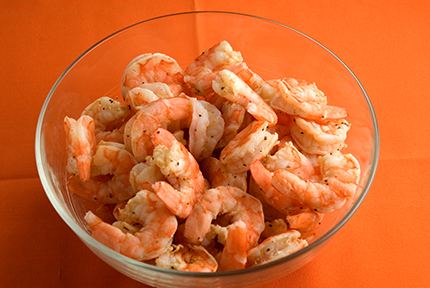
1 pound large cooked shrimp
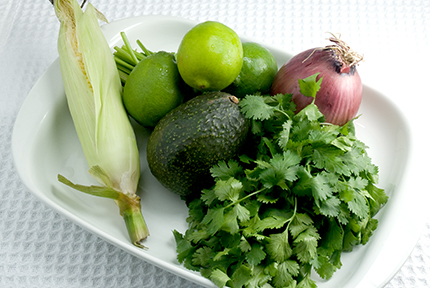
1 avocado, in large dice
1 cup fresh or canned corn
¼ cup chopped fresh cilantro
2 tablespoons chopped red onion
½ cup fresh lime juice
¼ cup honey
1 garlic clove, pressed or chopped
½ teaspoon salt
¼ teaspoon pepper
1/3 cup olive oil


Combine the shrimp, avocado, corn, cilantro and onion in a large bowl.
In a small bowl, combine the lime juice, honey, garlic clove, salt, pepper and olive oil and whisk until well combined.
Pour the vinaigrette over the salad (you may want to go a little at a time and taste as you go—I used most, but not quite all of the vinaigrette) and gently toss to combine.  Cover and chill for at least an hour before serving.   Don’t chill overnight, the whole thing will taste like shrimp and the avocado will fall apart.

10 Healthy Breakfasts in 10 minutes or Less


In the interest of saving time and space, I decided to dismantle the 40 Day Breakfast Challenge post series and create a new post highlighting 10 quick and healthy breakfasts. These breakfasts can be made in 10 minutes or less. There are tons of research studies showing why breakfast is important, but I would like to leave you with what I believe are the top 10 reasons.
  1. HEALTHY EATING HABITS – It is well established that people who eat breakfast consume less fat and cholesterol and more vitamins, minerals, and fiber than people who skip breakfast.
  2. WEIGHT MANAGEMENT – the National Weight Control Registry reported that people who eat breakfast have an easier time managing their weight than people who skip breakfast.
  3. PORTION CONTROL – In general, people who eat breakfast have an easier time controlling their caloric intake throughout the day than those who don’t.
  4. REDUCED RISK OF DIABETES – A report by the American Heart Association showed that people who eat breakfast are significantly less likely to develop diabetes than people who skip breakfast.
  5. MORE ENERGY – A healthy breakfast can provide your body with the nutrients that you need to stay energized for several hours.
  6. FITNESS – It is believed that people who eat breakfast have more energy and therefore may participate in more physical activity than people who skip breakfast.
  7. FOCUS – According to the American Dietetic Association, people who eat breakfast have an easier time focusing and are more productive throughout the morning than people who skip breakfast.
  8. MEMORY – Eating breakfast improves memory and learning.
  9. BETTER MOOD – Skipping breakfast can make you feel grumpy and fatigued throughout the day. Taking just 10 minutes to eat something in the morning can really improve your mood.
  10. BE A GOOD ROLE MODEL – Help your children to develop healthy eating habits at an early age by encouraging them to eat breakfast. If they see you eating breakfast, they are more likely to eat breakfast too.
Slow cooking oats or steel-cut oats with kiwi, mango, banana, green grapes, and honey
Organic flax waffles with warm peanut butter, banana slices, and chopped walnuts and a glass of 1% milk
Sesame Ezekiel toast with reduced fat cottage cheese, tomato slices, and parsley garnish
Tofu scramble with red peppers, zucchini, onions, and mushrooms….and tofu.
A classic: peanut butter and jelly on an English muffin (or toast or mini whole wheat bagel)
Breakfast bruschetta: French baguette with scrambled eggs, thin layer of reduced fat cream cheese, diced cherry tomatoes, and fresh parsley
Mini whole wheat waffles with mango chunks, honey, and powdered sugar
Whole wheat toast with scrambled eggs (or egg whites/substitute) with fresh sauteed spinach, provolone cheese, and marinara dipping sauce
Fruit bruschetta: organic chocolate cherry bread (from Whole Foods) topped with honey roasted peanut butter, fresh cantaloupe, strawberries, honey, and powdered sugar